FLOORBOARD FLOORING? It’s Easy If You Do It Smart
If you’ve ever stepped onto a floor and thought, “This feels solid, warm, and elegant,” chances are, it was floorboard flooring. There’s a reason hardwood or timber-style flooring continues to be a popular choice: it’s durable, beautiful, and increases home value. But if you’re thinking that installing it is hard, think again. If done smartly, it’s easier than most people think.
This guide will walk you through everything you need to know to get started from choosing the right materials to understanding how construction estimating, lumber estimating, and even plumbing estimating play a role in your flooring success.
Why Floorboard Flooring Is a Smart Choice
Before we get into the how-to, let’s talk about the why. Why should you even choose floorboard flooring in the first place?
Here’s what makes it an excellent option for you:
- Timeless beauty: Floorboards add a classic, warm look that works with any design.
- Long-lasting: When it is properly installed and maintained, they can last decades.
- Simple to maintain: A quick sweep and occasional mop are often enough.
- Boosts home value: Buyers also love hardwood floors. That’s just a fact.
Step 1: Planning Ahead (It Makes Everything Easier)
Doing it smart and starting before the boards even hit your home can make the whole process easy. There is no doubt that planning ahead can save you money, time, and major headaches.
-
Measure your space
You need to know how much flooring to buy. Don’t just guess at all. Use a proper tape measure and multiply the length by the width of each room to get square footage.
Now, add 10% more. Why? You’ll have waste from cuts, corners, and mistakes as well. This is where lumber estimating becomes useful. Indeed, accurate lumber estimating ensures you’re not overbuying or running short.
-
Think about moisture and plumbing
Are you planning to lay floorboards in a kitchen, bathroom, or in laundry? Stop and consider plumbing estimating before doing anything. You might need to make adjustments around pipes or drains. Plumbing-related work can affect the timeline and the type of flooring you choose. Never install solid hardwood where moisture is high. Engineered boards might be a safer choice for such places.
-
Budget like a pro
Use construction estimating services or tools if needed. Your budget should cover more than just the wood. Don’t forget tools, underlayment, adhesive (if needed), trim pieces, and any labor if you’re hiring any help.
Step 2: Choosing the Right Floorboard

Always keep in mind that not all floorboards are created equal. Here’s what to look for when buying:
Solid vs. Engineered Floorboards
- Solid hardwood: These are great for living rooms and bedrooms. Also, they can be sanded and refinished many times.
- Engineered wood: This is better for basements, kitchens, or areas with some moisture.
Finish Options
You can buy pre-finished boards (ready to install) or unfinished boards (which you stain and seal yourself). Pre-finished is easier and cleaner, but unfinished gives you more control over the final look.
Board Size and Style
Wider boards show fewer seams but can also expand more. Narrow boards offer a more classic look. You can also choose from straight planks, herringbone patterns, or even parquet styles depending on the vibe you’re going for.
Step 3: Prepare the Space
Getting your space ready is just as important as the installation itself.
What You’ll Need:
- Tape measure
- Rubber mallet
- Spacers
- Saw (for cutting boards)
- Underlayment
- Moisture barrier (if required)
Prep Tips:
- Acclimate your boards: Let the boards sit in the room for 3–5 days before installation. This helps prevent warping later.
- Clean the subfloor: Sweep it clean and make sure it’s dry and level.
- Install underlayment: Especially important if you’re going with a floating floor system. It adds cushion and soundproofing.
- Account for plumbing: Cut boards carefully around pipes, or better yet, hire a plumber if you need rerouting. This is where plumbing estimating and Hvac estimating helps you plan for extra costs.
Step 4: Installation Methods (Keep It Simple)
Depending on your flooring type, you’ll use one of the three main installation methods:
1. Nail-Down (Best for solid hardwood)
- Nail each board into a wooden subfloor.
- Requires a flooring nailer.
- Very stable and permanent.
2. Glue-Down (Good for engineered wood on concrete)
- Spread adhesive on the subfloor.
- Lay each board into the glue.
- Best for lower levels or slab homes.
3. Floating Floor (Perfect for DIYers)
- Boards click together and “float” over an underlayment.
- No nails or glue needed.
- Fast and beginner-friendly.
Whichever method you choose, remember to leave a 1/2-inch expansion gap along the walls. Wood expands and contracts with the humidity—tight installations will buckle.
Step 5: Smart Finishing Touches
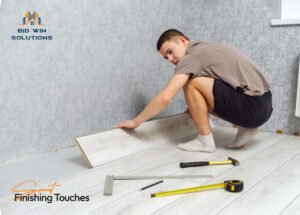
Once the boards are down, don’t rush the final steps.
Things to Do:
- Install trim or molding to cover expansion gaps.
- Check transitions between rooms and use proper threshold strips.
- Clean the floor with a damp cloth and check for any loose boards.
Take a few moments to walk the floor and spot any creaks, gaps, or uneven boards. Fix them now rather than later.
Maintenance Tips for Longevity
- Regular Cleaning: Sweep or vacuum regularly to remove the dirt and prevent scratches.
- Avoid Excess Moisture: Wipe up spills immediately and use a damp (not wet) mop for cleaning.
- Protective Pads: Place felt pads under the furniture legs to prevent dents and scratches.
- Area Rugs: Use rugs in the high-traffic areas to minimize wear.
- Refinishing: Over time, consider refinishing your floorboards to restore their original shine and remove surface imperfections.
Common Mistakes to Avoid

- Skipping Acclimation: Not allowing floorboards to adjust to room conditions can lead to warping.
- Ignoring Subfloor Issues: Uneven or damp subfloors can cause problems post-installation.
- Incorrect Measurements: Always double-check measurements to ensure you purchase the right amount of the material.
- Neglecting Expansion Gaps: Failing to leave gaps can result in buckling as the wood expands.
Final Thoughts: Smart Flooring, Smarter Planning
Smartly doing floorboard flooring isn’t just about how you lay the boards. It’s about planning every step, from construction estimating to lumber estimating and even plumbing estimating when needed.
When you do it smartly, you avoid any kind of surprises. You stay on budget as well. And you get a floor that doesn’t just look good—it lasts for years with very low maintenance.
So, if you’re considering floorboard flooring, take your time, get the numbers right, and think in the long run. The results will speak for themselves every time you walk into the room.


