The Basics of Drywall Installation: A Step-by-Step Guide for Beginners
Drywall is one of the most common elements in modern buildings; it is basically the base for building the walls and ceilings of a house. Highly adaptable, and not that difficult to install, it is one of the favorites of contractors and builders, not to mention amateurs. For the amateur trying to conquer drywall installation, a good drywall estimate, the subtleties and intricacies involved need to be well recognized. This article tries to put across what’s involved with the Basics of Drywall Installation in terms of principle and practice to enable a beginning to satisfactorily handle the work.
Preparation: Setting the Stage
Before discussing how drywall goes up, preparation is necessary. First, there is an evaluation of the scope of work, which typically involves renovating or building an interior space. Consider, first of all, the size of the space for drywall, including how many and where windows, doors, or structural elements are that may interfere with the process of installation.
Material Selection
Selection of appropriate materials is paramount. Drywall generally comes in 4 x 8-foot sheets and is composed of a gypsum core wrapped in a paper facing. One may also find several types, including regular, moisture-resistant, and fire-resistant drywall.

For instance, in areas that are subjected to high humidity, such as bathrooms and basements, the use of moisture-resistant green boards is highly advisable. One is supposed to buy more materials meant for the process, like joint compound, drywall tape, screws, and corner beads.
Tools and Equipment
A successful installation process requires numerous tools and equipment. A better familiarity with these tools can enhance productivity and precision at work. The following are the tools required:
- Measuring Tape: This is very important because it ensures the panels fit well in the desired places.
- Utility Knife: This is used for scoring the surface of drywall to give smooth breaks.
- Drywall Saw: It is perfect for intricate cuts and making allowances for electrical outlets.
- Drill and Screws: Power tools enable drywall to be fastened onto studs quickly, with screws for drywall having a bugle head and being designed to avoid popping or breaking the board.
- Taping Knives and Mud Pan: These are for applying the joint compound to obtain a perfect finish on seams.
- Sanding Sponge: It is required for post-compound application to smoothen the surface to ensure a finished look.
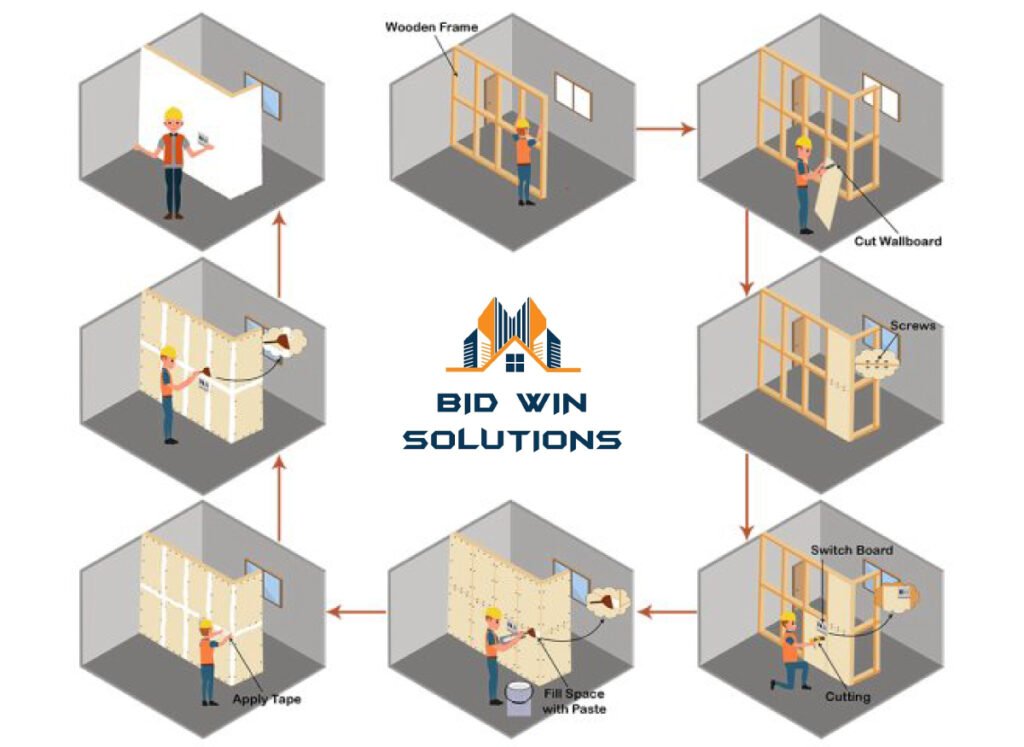
Step-by-Step Installation Process
After all the preparatory measures have been undertaken, one can proceed with the installation process. Below are outlined clear steps on the Basics of Drywall Installation:
Step 1: Framing the Area
Before the drywall sheets are attached to the wall, the structure should be sound. The framing consists of either wooden or metal studs that need to be suitably spaced at either 16 or 24 inches on center, depending on the building code. The studs need to be checked for plumb and level using a level to determine alignment; if this is not the case, shimming may be required to fix misalignment problems.
Step 2: Measure and Cut
Once the framing is done, take the drywall sheets outside and measure, cut them to size. Using your tape measure, determine length and width to fit an area, taking into account window and door placement. Take your utility knife and score the drywall on your measured line. Next, simply snap the sheet along your scored line for a clean break. If one needs to make detailed cuts, say around the electrical outlets, he can always resort to a drywall saw.
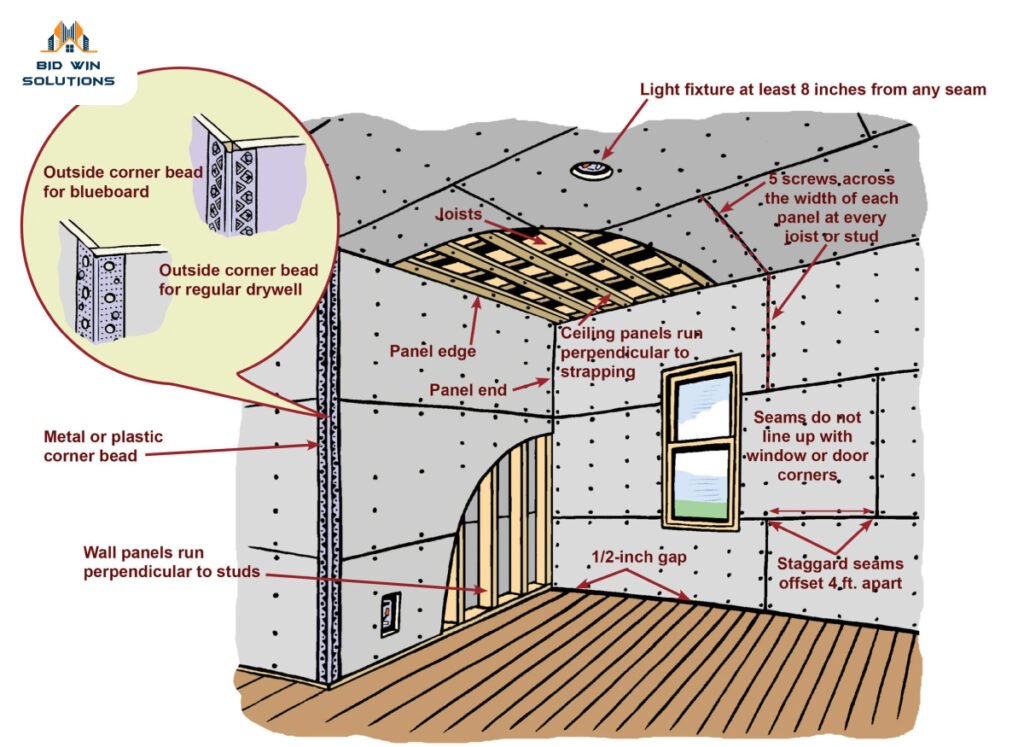
Step 3: Hang the Drywall on the Frame
First, fasten the drywall sheets from the top to the bottom of the wall. In order to apply joint compound effectively, use drywall screws to secure the sheets to the studs, making sure the screws are sunk just below the surface. Use a screw gun and drive screws about every 16 inches around the perimeter and in the field of the sheet. To achieve maximum structural strength and to minimize visible seams, it is best to stagger the joints between adjacent sheets.
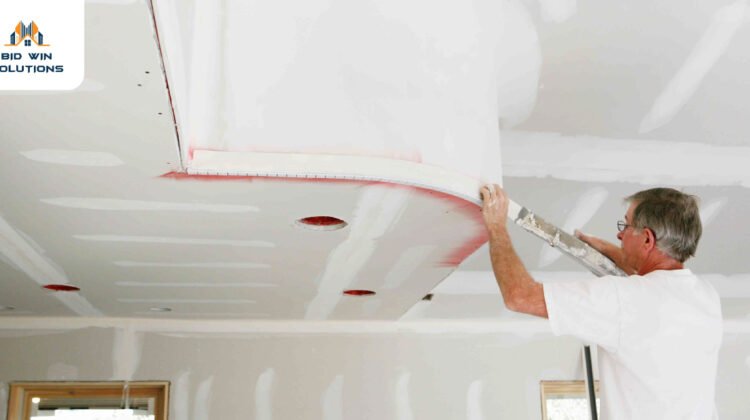
Step 4: Taping and Mudding
Once the drywall has been fastened, taping and applying joint compound is started. Lay drywall tape over the seams and joints, either a fiberglass mesh or paper tape. With your drywall knife, apply joint compound over the tape, adequately covering and filling in the voids and depressions. It is necessary to feather out the compound’s edges to make it smooth. According to the circumstances, the compound takes time to dry completely.
Step 5: Finalization and Sanding
Now, sanding is necessary with the joint dried compound. Take a sanding block or a power sander with fine-grit sandpaper and carefully smooth out the joints that have been filled with the compound. Avoid gauging the surface of the drywall. After sanding, make an assessment of the applied method. Extra coats of the joint compound may be needed; do the same as above, let the area dry, and then lightly sand.
Step 6: Sanding, Primer, Painting
Finally, the last stage of the drywall installation involves primer and paint after a satisfying finish. Primer not only encourages adhesion of the succeeding layer of paint but also builds up a uniform finish in order to make the wall look more attractive. Proceed to apply, using a paint roller and then a paintbrush to smoothly touch it up with the preferred color, hence personalizing to suit the style intended for the newly mounted drywall.

Conclusion: How to Master Drywall Installation Basics
The seemingly simple project of installing drywall actually requires intensive cost estimation, planning, precision in execution, and attention to detail. This is actually a work which, if the processes and guidelines highlighted in the Basics of Drywall Installation are followed, even a novice will be enabled to undertake skillfully.
In this regard, like all skilled trades, the more a person practices the trade, the better one becomes; this could also be the case in drywall installation-as with each succeeding installation, confidence and expertise will be blooming.
But with practice, it will prove not only useful in developing one’s abode, but also form a good foundation toward further forays into the world of home improvement and renovation. With this knowledge in hand and the novices putting determination, they can well begin this rewarding journey so important in this world of drywall installation.